

I've recently gotten more into Twitter. And in doing so I have come across some amazing recipes and some fabulous people willing to share them and walk you through how they do it.
A recent discovery is Julie of Willow Bird Baking. Julie is a bright and cheerful young lady who is passionate about all things baking. The difference between Julie and I is Julie actually invents her recipes - and they are amazing! Whereas, I am just a newbie still learning about all this baking stuff anyway. I find a recipe and can create it. Granted, with my Oh Katie! Cookies, that's been an experience of testing and trying new things out. So I guess I should give myself a little bit of credit. But I'm nooooo Julie! And that's OK.
Last week I watched a video she posted. It was for a contest, I think. It was fun to watch. Extremely informative and walked the viewer right through the steps of making amazing cheesecakes while making it look fairly easy. Correction: "Flippin Awesome Cheesecakes."
Having never made a cheesecake before, I felt empowered with this information. Sunday was a beautiful, chilly, rainy day with two out of the three kids with Oma and Opa. The perfect baking day - while drinking many pots of coffee because that's just the kind of day it was.
Because I had the ingredients for the Coffee Cookie Dough Fudge Cheesecake, I thought I got this! Then I started looking more closely at all the steps and I started feeling more and more lazy. Maybe I could just sit and watch football in front of the fire with the hubby while the baby napped instead? Fine! I ranted. I'll make it! to no one in particular.
This is an all day process. At least it was for me. Well, "all day" meaning I started around 2 and we had a slice after dinner around 7. ALL DAY, I tell ya!
Cookie Dough Fudge Cheesecake
Recipe by: Willow Bird Baking, adapted from Annies’ Eats’ Cappucino Fudge Cheesecake with eggless cookie dough by Family Fun
Yields: one 9-inch cheesecake
Crust Ingredients:
32 chocolate sandwich cookies, finely processed into crumbs
5 1/3 tablespoons unsalted butter, melted and cooled
Small pinch of salt
Ganache Ingredients:
1½ cups heavy cream
20 oz. bittersweet or semisweet chocolate, finely chopped (I combined both)
Filling Ingredients:
3 (8 oz.) packages cream cheese, at room temperature
1 cup sugar
1½ tablespoons all-purpose flour
1 tablespoons instant coffee granules
2 teaspoons vanilla extract
1½ teaspoons mild-flavored (light) molasses
3 large eggs
Topping Ingredients:
1½ cups sour cream
1/3 cup sugar
2 teaspoons vanilla extract
Cookie Dough Layer Ingredients:
1/2 cup butter, softened
3/4 cup light brown sugar, packed
1 cup all-purpose flour
1/2 teaspoon salt
1 tablespoon vanilla extract
1 cup semisweet chocolate chips
4 to 6 tablespoons water (I used 4)
Directions:
To make the crust, butter a 9-inch springform pan. Combine the chocolate cookie crumbs, melted butter and salt in a small bowl. Toss with a fork to moisten all of the crumbs. Press into a thin layer covering the bottom and sides of the springform pan (at least 3 inches up the sides). I did this using a smooth glass to press crumbs into place.
Bring the cream to a simmer in a medium saucepan. Place the chocolate in a medium bowl. Once the cream reaches a simmer, pour the cream over the chocolate and let stand 1-2 minutes. Whisk in small circles until a smooth ganache has formed. Pour 1.5-2 cups of the ganache over the bottom of the crust. Freeze until the ganache layer is firm, about 30 minutes. Reserve the remaining ganache; cover and let stand at room temperature for later decorating.
Preheat the oven to 350˚ F and position a rack in the middle of the oven. In the bowl of an electric mixer fitted with the paddle attachment, beat the cream cheese and sugar on medium-high speed until well blended. Beat in the flour. In a small bowl, combine the coffee granules, vanilla and molasses, stirring until the coffee dissolves. Add to the cream cheese mixture and beat until well incorporated, scraping down the sides of the bowl as needed. Beat in the eggs one at a time, scraping down the bowl between each addition.
Pour the filling over the cold ganache in the crust. Enclose the bottom of the springform pan in tightly wrapped foil and place it in a baking dish. Fill the baking dish with hot water about halfway up the cheesecake pan, careful not to let the moisture touch the cheesecake. Bake until the top is lightly browned, puffed and cracked at the edges, and the center moves only very slightly when the pan is lightly shaken, about 1 hour. Transfer to a wire cooling rack. Cool 15 minutes while preparing the topping (maintaining the oven temperature.)
To make the topping, whisk together the sour cream, sugar and vanilla in a small bowl. Pour the topping over the hot cheesecake, spreading to cover the filling completely. Bake until the topping is set, about 10-15 minutes. Return to the cooling rack and let cool at room temperature for at least 30 minutes. Transfer to the refrigerator and let cool at least 3 hours, until completely chilled and set.
To make cookie dough layer, cream together the butter and sugar in a large bowl. Stir in the flour, salt, vanilla and chips. Add the water, one tablespoon at a time, until you have reached a cookie dough consistency. Line a 9-inch cake pan with parchment paper. Spoon the cookie dough into the pan and flatten to an even layer. Freeze the cookie dough layer until ready to use (at least 30 minutes).
To finish, wrap a warm towel around the outside of the springform pan to help loosen the crust from the sides. Carefully remove the springform. Transfer the cake to a serving platter. Turn cookie dough out of cake pan and place layer on top of cheesecake, pressing it gently into place. Place the reserved ganache in a pastry bag fitted with a decorative tip and use to garnish the top of the cake as desired. Chill until the ganache is completely firm, at least 6 hours.

I knew I would come up short in the crust area but I wasn't gonna let that stop me. Also, more than half of the

In Julie's video, she has the most perfect glass for compacting the cookie crumbs into the pan. I gotta find me one of those. I did the best I could with the flattest-bottomed glass I could find:
I abandoned this pretty quickly and just used my hands. You know, your (clean) hands often make the best tools in baking.
 As I suspected I came up a little short on the crust department, but I really couldn't see how that would effect the final product. It didn't.
Next came a very interesting aspect of the cheesecake making aspect. One that is not found in most recipes. Typically at this point, I would put the crust into the oven and bake it for 10 or 12 minutes to set the crust. In Julie's recipe, however, and it appears to be this way in most of her cheesecake recipes, she creates a ganache and pours it on top of the crust instead of baking it.

The ganache was so simple and it was beautiful.

Soooo pretty! I will now be making a ganache and applying to everything. I think.
After pouring it over the crust and smoothing it a bit, the pan goes into the freezer to chill out for about 30 minutes. In the mean time, start making the filling. Which I have no pictures of. Pretty straight forward.
The most, the MOST important detail about making a cheesecake: your cream cheese and eggs must be room temperature. Must! There is no getting around this. If they are not, your filling will be lumpy and just plain pathetic!
Another important note when mixing your filling: scrape down the mixing bowl often. What do I mean by scrape down? Turn off the mixer, let down the bowl, and with a flat silicone spatula rub all the goo off the sides and bottom of the bowl and wipe it back on the mixing blade.
Glad we are all clear on that. Next important note on cheesecake baking (OK I didn't realize there were so many) water bath. Cheesecakes need water baths. They crave the extra moisture while baking. They just do. I didn't have any aluminum foil so I filled a large roasting pan halfway and put it just under the cheesecake in the oven. Perfect!
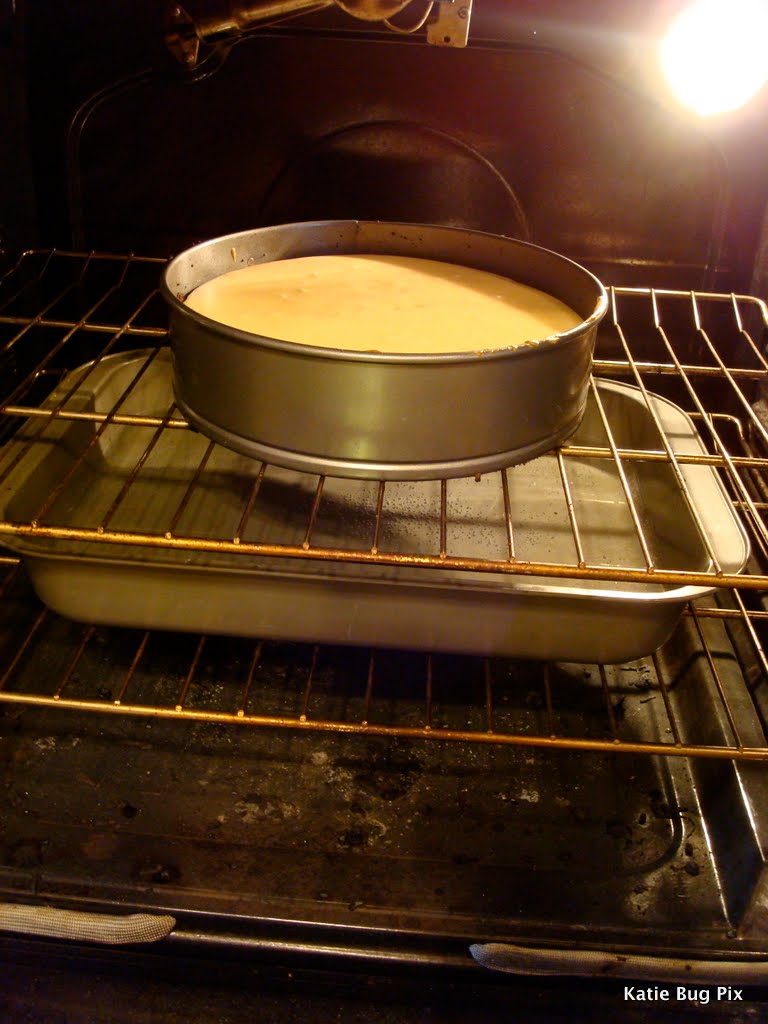
I felt so nervous about how long to bake it for and how to tell if it's really done or not. The directions are pretty clear: "lightly browned, puffed and cracked at the edges, and the center moves only very slightly when the pan is lightly shaken, about one hour." I still chew off several fingernails debating whether or not to take it out.

Because I like to jump ahead, I made the first topping. There are two. So I mixed up the sour cream/sugar topping and was ready for it when it came out the first time. I applied it and smoothed it a bit. Then it went back in the oven.

This is my little scout making sure I have it all in there correctly. Yep, I do. I hope.
After this is done, it hangs out on a cooling rack for about 30 minutes. Then goes into the fridge for 3 hours. Told you it was an all day ordeal.

While that's happening, you then make the next topping: eggless cookie dough. It was so yummy and interesting! I would love to see if this batter actually bakes cookies or what they would be like. It goes into a pan then freezes.
Since I have a larger than normal springform pan, I knew a regular 9" pie pan would not work for the cookie dough topping. So here's what I did:

Tee hee. Hey, it works!
When dinner was over - and with my husband's help - I assembled everything and did some decorating with the left over ganache. Such a new and fun word!
Here's the newborn cheesecake wrapped in her warm blankie....


So this is what the crust should do. And it did. On just this one part.
 This is basically what it did on the rest of it. Again, I just can't possibly see how that would interfere with anything.
At this point my husband kept glancing at me wondering why I was torturing him so, knowing I was not quite done.
There are no words from here on out.... Enjoy!


Quite the cheesecake to take on for it being your first, but GREAT job!! Love the pictures too! That cheesecake looks Super YUM!
ReplyDeleteThank you so much! It was quite the challenge, but I really wanted to make something spectacular. Plus, it was made to look so easy by Willow Bird Baking!
ReplyDelete