Showing posts with label baking. Show all posts

Wednesday, June 8, 2011

A Chocolate Cookie Recipe to Blow Your Mind

I came across this recipe in some random way on Twitter. Guess it happens that way, right? Started reading through it and I believe the dialogue in my head sounded something like, "Wait, huh? Wha? No! How's that... Whoa. What the what?"

And I simply could not stop thinking about it. The recipe calls for equal parts bread and cake flour. Bread and Cake Flour. Did you get that??? "There's different flours?" you ask.
OK, OK, trying not to laugh. As soon as I'm done laughing...

But seriously. Did you see "Stranger Than Fiction"? One of THE most romantic and thoughtful gestures ever!

Difference between flours. Here's a great little explanation from www.thekitchn.com

First, what's actually the same about all these flours is that they are made from wheat. What makes them different is how they're milled, what kind of wheat they're made from, and even what time of year the wheat was harvested. But what it really all boils down to is protein content.

Protein content is directly related to how much gluten can be formed using that particular flour. Gluten helps create structure and determine texture in your final baked good. Flours with low protein contents will generate less gluten and flours with high protein content will create more.

To get the light and airy structure of cakes, you want a flour with very little protein. But to form the dense chewy structure of bread, you want a flour with a lot of protein so that you can create as much gluten as possible.

Here is the approximate protein content of all the common types of flour:
Bread Flour: 14 - 16%
All-Purpose (AP) Flour: 10 - 12%
Pastry Flour: 9%
Cake Flour: 7-8%

The cookie recipe calls specifically for bittersweet baking chips with at least 60% cocoa. Easy enough. Ghirardelli makes these and they are beautiful! See?
The next thing that interested me about this recipe: after you mix the batter, it's sealed and kept in the fridge for no less than 36 hours before baking. I could go in to all this guessing about the what and why about that, but I don't really care. I just do what the recipe says. One of the biggest mistakes when it comes to baking is NOT following the recipe.

And then and then and Then! After using your handy dandy scoop to prepare the dough on the pans... Let's talk scoops.
I have a couple of these and it drives me up the wall, it comes off it's track and I want to throw it. I don't have a clue why I allow it to remain in my baking tool drawer. Maybe I'll make a Christmas ornament out of it.

But I also have a few of these and I love them!
They come in lots of different sizes. Woo Hoo! get a few of these for your baking. You can create evenly sized cookies and muffins. They are just really a useful tool.

After you scoop the dough on the pans, spacing them pretty far apart, press down slightly. I have found this will help them bake more evenly and be so darn pretty when they are done.

Here comes the next crazy thing about this recipe - lightly sprinkle the dough with sea salt before baking. Can you imagine? OK, so it's not unheard of, but still. I have to say it makes for an amazing flavor: the sweetness of the dough itself, the bittersweet chocolate, and then the slight taste of sea salt - words cannot describe how amazing these are.

I will never bake another chocolate chip cookie again. I mean, not another recipe. I mean, I will bake thousands of these!


And they really do look this amazing. Promise!

Happy Baking!!!!!

Thursday, March 10, 2011

Confession and a Challenge. (Brownie related)

Tartine Brownies. Warm. Cut. Ready to eat.
Confession: Yesterday I made brownies from a box. It was disgusting and I swear to never do it again. But my daughter asked to make brownies together and in my sleep deprivation I was too lazy to get out the sifter and all the ingredients to go with it.

And there was a box of brownie mix begging and pleading to be used. "America's Favorite Brownie," the box yelled. Hardly. I will not admit to any knowledge of how that box got in there. I won't do it. But it was. And I did.

Bakers, please forgive me. For I know now what I did.

Challenge: I invite you to make some real brownies this coming weekend. You will never go back to that cheap, convenient box again. I swear. Or at least if you do, the guilt will overwhelm you. If you are Irish Catholic by birth, as I am, then I know that to be the truth.

My go to recipe is the on on the can of Ghirardelli Sweet Ground Chocolate and Cocoa.

And I also have this entry for Tartine Brownies that has a complete walk through.

Please let me know how it goes. Swear you won't be sorry!

Tuesday, December 28, 2010

Detach, Dissect, Segregate, Cleave, Disentangle... or Separating Eggs.

If you love to bake as much as I do, I go through tons of eggs! I can't imagine how many hens I would require in order to keep up.

And until I have the desire to raise hens, Costco it is.

Sometimes, I come across a recipe that requires only one part of the egg, either the white or the yolk. Take yesterday, I made The Best Coffeecake Ever by the Pioneer Woman. The recipe requires three whipped eggwhites.

It just so happens that I am currently reading through The Essential Baker by Carole Bloom and recently read the three different ways to separate eggs.

1.) To use an egg separator tool. Which looks like this


2.) To do the ol' Eggshell Shuffle: where you crack the egg open and, while holding the egg over a bowl, pass the egg back and forth betwixt eggshells and allow the white to fall to the bowl.
Image from Simplyrecipes.com
This was my tried and true method to date and there have been several times I have messed up and dropped bits of yolk into the egg whites - which can render the entire meringue goal useless.

3.) Now I have discovered the most amazing, simple way to separate eggs and I do believe this will be my method from now on. Crack the egg open and place the egg into your cupped hand - over a bowl! - the egg white will fall through your fingers and you are left with the pretty, happy, little lonesome yolk.


Ta Daaaaaa!!!!!!!!!!!

Have any egg separation tricks to share?

Wednesday, December 22, 2010

My popular favorite, moist, delicious Scone Recipe.


This is sincerely the greatest scone recipe I have tried. In fact, I had never really had a scone until I made these. Sure, in sheer desperation I have regrettably purchased scones from coffee shops here and there... and lived to tell the tale. But one day I came across this particular recipe on the Joy of Baking website and thought it looked so simple, why not give it a try.

The original recipe is for chocolate chip scones, and they are delicious. However, I have spent months playing around with other flavor combinations and learned some neat tricks along the way and I am finally ready to share my Yummy Scone Recipe!

Some tips before you begin:

·      Have all your ingredients and tools out and ready.
·      Using a baking sheet to pour all your ingredients over so you don’t make a mess on the counter.
·      Your butter must be cold cold cold! Frozen even.
·      When measuring flour, pour the flour into the measuring cup then scrape off the excess with a flat edge. Do not scoop out your flour from the bag using the measuring cup.
·      If you do not have buttermilk, put a tablespoon (or two) of vinegar in a measuring cup and fill the rest of the way with milk or half & half. Allow it to sit for a few minutes. Voila! Buttermilk.

 Flavor choices.
There are numerous choices you can make and experiment with. Here are a few tried and true combinations:
Dried Blueberry / Chopped pecans / lemon or vanilla extract
Dried cherries / slivered almonds / almond extract
Dried cranberries / chocolate or white chocolate chips / vanilla extract
Raisins / 1 tsp of cinnamon / vanilla extract
Dried peaches / 1 tsp cardamom / lemon extract


Ingredients:
2 cups all purpose flour.
¼ cup granulated white sugar
1 ¼ teaspoon baking powder
¼ teaspoon baking soda
¼ teaspoon salt
½ cup (1 stick) unsalted cold butter
A total of 1 cup nuts and/or dried fruit
1 teaspoon extract
2/3 – ¾ cup buttermilk
1 egg
Turbinado or raw sugar for topping
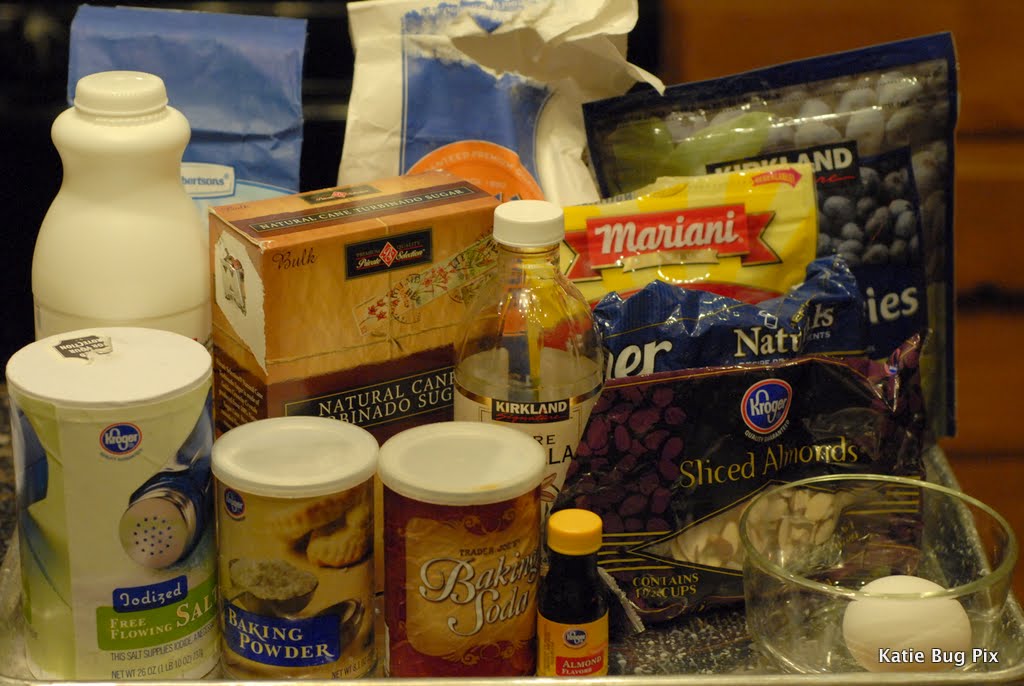
Let's got all our ingredients:

Imagine a big block of butter in here too. Woops.
Let's get all our tools:
Preheat your oven:
Prepare your pan with a spray of cooking spray and parchment paper.
Also, put a handful of flour on your pan for later.
Not sure why the color looks so strange.
Measure 1/2 cup dried fruit into a small bowl and cover it with water. Allow it to sit until you are ready for it. These are dried cherries and blueberries. I'm making cherry/almond and blueberry/pecan.

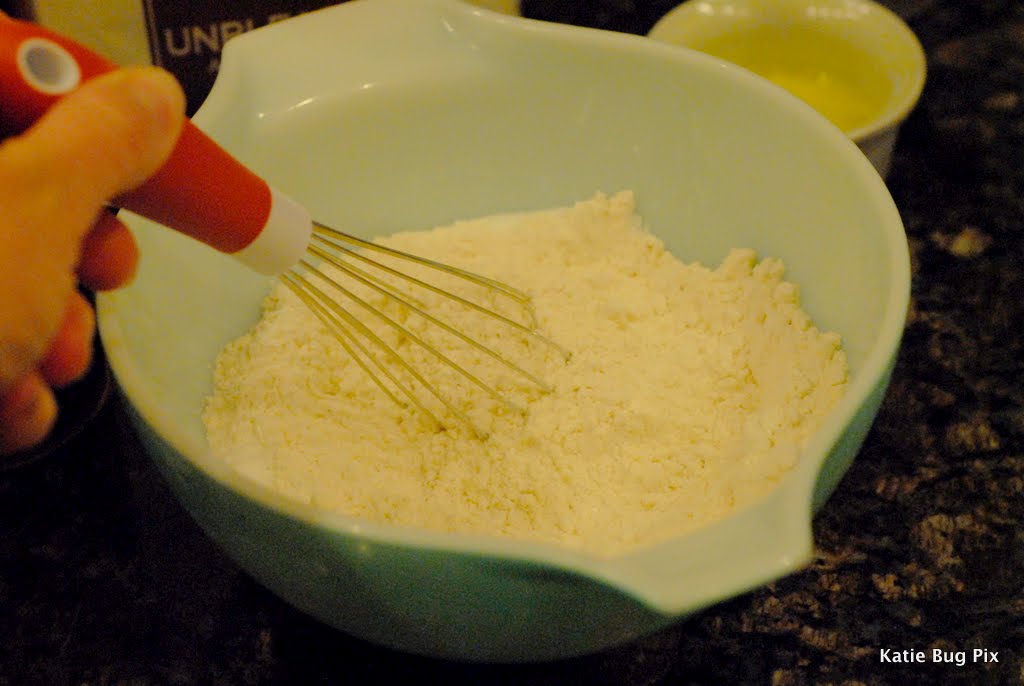
In large bowl, whisk together the flour, sugar, baking powder, baking soda and salt. 

Remember, when measuring your flour, pour it from the bag into the measuring cup then scrape off the excess with a flat edge.


 Once you have all your dry ingredients, now comes the butter. It better be cold, COLD, I tell you! Frozen, even. I recently learned the greatest trick evah regarding getting the cold butter in small enough mixable pieces for the scones. There is a great food blogger named Brown Eyed Baker and she shared this trick for making perfect pie crust. I knew instantly that it would work for my scones and I can't tell you how happy I was!


Ready? Ready????


A Cheese Grater!!!!!!
Ta Daaaaaaa!!!!!!!!
Here's what I do. First, I buy large blocks of butter because I go through tons of it. You do know you can freeze butter, right? Don't be afraid to buy it in bulk just because you think you won't go through it all. Freeze that buttah!


Since the recipe calls for one stick of butter and one stick of butter equals 1/4 cup, I remove the paper to where the 1/4 cup line is, or somewhat close.


Then, grate!
 And look at this magic pile of slivered cold butter that comes forth!
 I'm telling you, it's almost too much!
 Put the butter in the bowl with the dry ingredients. Using your clean hands, smash the butter between your fingers, mixing it with the flour until it is all incorporated and looks like coarse crumbles.
See? Coarse crumbles.

Now we are going to measure 1/2 cup of slivered almonds. Oh, forgot to mention, this recipe is one of my favorites: Cherry Almond. I messed up above and used vanilla instead of almond extract. Boo hoo! S'ok. They are still amazing.


Now, drain the cherries that have been soaking in water. 

HINT: when using dried fruit in scones, the fruit cannot be larger than a blueberry or it will be too big and make the scone fall apart. So take a large knife and just chop through the fruit a few times. No need to mince it, just a good chop.
Here we have added the almonds and cherries to the dry ingredients.

Now pour in the buttermilk/extract mixture.


I like to take a big wooden spoon and swirl it around the edge a few times before I dig in with my clean hands to mix everything completely. Your hands are often the greatest tool!


Mix until dough just comes together. Then transfer the dough the floured surface on the prepared baking pan.
Shape the dough into a inch and a half thick wheel shape.


(I'm gonna stop right here and say I am so tired of Europeans making fun of how Americans do scones. So we like to add all kinds of nuts and fruit!? So we like them in a cone shape?! What of it! Are we constantly making fun of the fact that you have such little interest in dental hygiene???? Oh wait...)

Anyway, at this point I crack an egg and whisk it around a little. Using a pastry brush brush the entire top of the scone wheel with egg.


Then sprinkle with tons however much Turbinado or raw sugar you like. Or not, maybe you are European and rolling around in disgust at all the sugar this American puts in her pastry. That's OK. I can out-sugar you any day.
Taking a large knife, cut across the wheel a total of 4 times. Like a pizza! So you end up with eight separate scones.
Carefully pull them apart and distance each scone from one another. Scones do not play nice with each other.
 Slide into the oven. Set the timer for 16 minutes then turn the entire pan and add another 2 minutes to the timer.
 Voila! Moist, American Scones! (tee hee) 


You can easily make a double batch of scones, place them on two separate pans, bake one right away and cover the other with plastic wrap. This pan can remain in the fridge for up to three days. Imagine, fresh baked scones during the week!
 

Sunday, December 5, 2010

Mini Maple Pancake Muffins. Review and Yum!

A friend of mine recently reminded me of an amazing baking site called Bakerella. I had not been there in a while and when I went to glance and remember, these were staring at me on the front page. Always looking for new ways to make breakfast a little more exciting so the children will strongly consider staying at the table and consuming food, I knew I had to try them.


Here's the recipe from Bakerella.

Generously grease a 24 cup mini muffin pan with non-stick spray.

Mini Maple Chocolate Chip Pancake Muffins.

1 cup flour

1 teaspoon baking powder

1/2 teaspoon baking soda

1/4 teaspoon salt

2 tablespoons sugar
2/3 cup buttermilk

1 egg

2 tablespoons pure maple syrup
2 tablespoons melted butter

1/2 cup milk chocolate chips

• Preheat oven to 350 degrees.

• Combine flour, baking powder, baking soda, salt and sugar in a medium bowl. Sift together with a wire whisk.
• In another bowl, stir buttermilk, egg, maple syrup and melted butter until just combined.
• Add wet ingredients to dry ingredients and stir with a spoon until combined.
• Stir in chocolate chips. Reserve a few chips to sprinkle on the tops.
• Bake for 8-9 minutes.

Makes 24 mini pancake muffins.
Let cool slightly and remove from the pan. You may need to use a toothpick around the edges to separate the pancake muffins from the pan.
Serve immediately with warmed butter if you like or even just with maple syrup.

It's really very simple. You are making a basic pancake mix - although this one has yummy maple syrup in it - and baking them in mini muffin pans.

Let's get started.


On one of my recent baking supply shopping sprees - where everything is on sale because it's the Holiday Season! - I purchased these mini muffin pan liners. Cute!


The mini muffin pans themselves were found at a thrift store. Love love love thrift stores!


I started this new thing called Get All Your Ingredients Ready Before You Start. I'm sure I've heard many a baker/chef tout the same concept - it's a pretty crazy concept. But it's amazing and I highly recommend it!


Let me also remind you about my most favorite "tool." That would be the baking sheet over which I measure everything. I also place all yucky tools on it. The clean up factor is amazing! Please try this, at least once. This baking pan is now the first item I get out when I'm collecting everything I need for whatever I'm baking.


Whisk together your dry ingredients.


Then realize the bowl isn't big enough and transfer said ingredients to a larger bowl.


Start mixing your liquids in the first bowl.


I am also a big proponent of getting the least amount of dishes dirty. So I break the egg into the glass measuring cup where I just measured the buttermilk.


See? There's the egg. He's happy. I always always always break my eggs in a separate container, not directly into the batter. Digging out eggshells is not my thing. Not at all and it never will be.

Add the liquids to the dry ingredients and stir just until combined. Then add the chocolate chips.

Allow me to introduce my next favorite baking tool. The measuring scoop.


La la la laaaaaaaaa!!!!


Let's look at her from another angle. Nice! This is a tablespoon-sized measuring scoop. The only reason I know that is because I measured it myself by filling a tablespoon of water into the scoop. Would certainly be more helpful if the tag or the scoop itself simply said how much it held, but it didn't and it doesn't.


I fill the scoop and run it across the edge of the bowl, like so.

I came up short for exactly two. Oh well. Having only 22 mini maple pancake muffins is not necessarily a bad thing. I took out those paper liners, by the way, before I put them in the oven.

Here's something else I did before I put them in the oven.


I put a few chocolate chips on top of the batter. It's pretty.
Mine took a lot longer to cook than the 8 or 9 minutes in the recipe. A lot longer. Not sure what it was. They sort of started to brown on tops and I think I just figured good grief, they have to be done!
Yes, i took the paper away from him. Promise.
 They were a huge hit. I used the last of the maple syrup we had for the recipe. But I figured with all the chocolate in them, they were quite sweet enough. I melted some butter and had that sitting on standby, but there was really no need. They were delicious. Nothing healthy about them and it wasn't one of those breakfasts that made me think, "I feel great as a mother, I fed my family a healthy hardy meal!" But we all need treats once in a while. And it was a truly yummy treat.

Here's one issue, or another issue, I had with them: Even though they had a great puffy top, when you opened the wrapper, it was as if the muffin was missing. It was a strange phenomenon and I would love anyone's input as to what that might have been caused by.


Highly recommended!