Showing posts with label Cookies. Show all posts

Wednesday, June 8, 2011

A Chocolate Cookie Recipe to Blow Your Mind

I came across this recipe in some random way on Twitter. Guess it happens that way, right? Started reading through it and I believe the dialogue in my head sounded something like, "Wait, huh? Wha? No! How's that... Whoa. What the what?"

And I simply could not stop thinking about it. The recipe calls for equal parts bread and cake flour. Bread and Cake Flour. Did you get that??? "There's different flours?" you ask.
OK, OK, trying not to laugh. As soon as I'm done laughing...

But seriously. Did you see "Stranger Than Fiction"? One of THE most romantic and thoughtful gestures ever!

Difference between flours. Here's a great little explanation from www.thekitchn.com

First, what's actually the same about all these flours is that they are made from wheat. What makes them different is how they're milled, what kind of wheat they're made from, and even what time of year the wheat was harvested. But what it really all boils down to is protein content.

Protein content is directly related to how much gluten can be formed using that particular flour. Gluten helps create structure and determine texture in your final baked good. Flours with low protein contents will generate less gluten and flours with high protein content will create more.

To get the light and airy structure of cakes, you want a flour with very little protein. But to form the dense chewy structure of bread, you want a flour with a lot of protein so that you can create as much gluten as possible.

Here is the approximate protein content of all the common types of flour:
Bread Flour: 14 - 16%
All-Purpose (AP) Flour: 10 - 12%
Pastry Flour: 9%
Cake Flour: 7-8%

The cookie recipe calls specifically for bittersweet baking chips with at least 60% cocoa. Easy enough. Ghirardelli makes these and they are beautiful! See?
The next thing that interested me about this recipe: after you mix the batter, it's sealed and kept in the fridge for no less than 36 hours before baking. I could go in to all this guessing about the what and why about that, but I don't really care. I just do what the recipe says. One of the biggest mistakes when it comes to baking is NOT following the recipe.

And then and then and Then! After using your handy dandy scoop to prepare the dough on the pans... Let's talk scoops.
I have a couple of these and it drives me up the wall, it comes off it's track and I want to throw it. I don't have a clue why I allow it to remain in my baking tool drawer. Maybe I'll make a Christmas ornament out of it.

But I also have a few of these and I love them!
They come in lots of different sizes. Woo Hoo! get a few of these for your baking. You can create evenly sized cookies and muffins. They are just really a useful tool.

After you scoop the dough on the pans, spacing them pretty far apart, press down slightly. I have found this will help them bake more evenly and be so darn pretty when they are done.

Here comes the next crazy thing about this recipe - lightly sprinkle the dough with sea salt before baking. Can you imagine? OK, so it's not unheard of, but still. I have to say it makes for an amazing flavor: the sweetness of the dough itself, the bittersweet chocolate, and then the slight taste of sea salt - words cannot describe how amazing these are.

I will never bake another chocolate chip cookie again. I mean, not another recipe. I mean, I will bake thousands of these!


And they really do look this amazing. Promise!

Happy Baking!!!!!

Thursday, March 10, 2011

Confession and a Challenge. (Brownie related)

Tartine Brownies. Warm. Cut. Ready to eat.
Confession: Yesterday I made brownies from a box. It was disgusting and I swear to never do it again. But my daughter asked to make brownies together and in my sleep deprivation I was too lazy to get out the sifter and all the ingredients to go with it.

And there was a box of brownie mix begging and pleading to be used. "America's Favorite Brownie," the box yelled. Hardly. I will not admit to any knowledge of how that box got in there. I won't do it. But it was. And I did.

Bakers, please forgive me. For I know now what I did.

Challenge: I invite you to make some real brownies this coming weekend. You will never go back to that cheap, convenient box again. I swear. Or at least if you do, the guilt will overwhelm you. If you are Irish Catholic by birth, as I am, then I know that to be the truth.

My go to recipe is the on on the can of Ghirardelli Sweet Ground Chocolate and Cocoa.

And I also have this entry for Tartine Brownies that has a complete walk through.

Please let me know how it goes. Swear you won't be sorry!

Friday, December 3, 2010

Contest: Win a dozen White Chocolate Peppermint Oh Katie! Cookies Free!

I'm going to start holding my contest on the official Oh Katie! Cookie blog. Mostly because it will help me stay organized and be able to pick clear winners.

As I have mentioned previously, I am really so very excited for this months' flavor - it is my absolute favorite flavor (for right now.)

White Chocolate Peppermint Oh Katie! Cookies

So here's how it's gonna go, nothing fancy or challenging, just leave a comment below. That's your main entry.

Answer this question (ok, it's a two-part): Do you love Oh Katie! Cookies? And have you told everyone you know about them?

Now, for additional entries: (Leave your response in a separate comment, and that will be your additional entries.) You have a total of FIVE chances to win!

1.  "Like" Oh Katie! Cookies on Facebook. (leave your first name and last initial. I have to keep you honest, right?) If you already like me, and I thank you immensely! leave your name too.

2. Follow this blog through the Google Friend Connect.

3. Follow @ohkatiecookies on Twitter and spread this Tweet: @ohkatiecookies has some of the greatest cookies evah! http://bit.ly/h8SnAB

4.  Make an announcement on FB telling all your followers to Like the Oh Katie! Cookie page.

The contest includes shipping. I am opening this one up to my fellow Canadians. (it is the Holiday season and all.)

The contest will close on Sunday at 8:00PM MST is over! One winner will be picked by Random.org. Said winner has until Monday evening to respond with an address or a new winner will be chosen by the same method. That's the way the cookie crumbles. Get it? get it?

Let the game begin! Goodluck!!!

Winner is #19: Emily!!! You won! You won!!!! I'll contact you to let you know, but please give me your address and I will get these out to you ASAP!

Congratulations!!!!

Tuesday, November 23, 2010

Did you know... when transporting mashed taters...

...when needing to tote some of the most amazing mashed potatoes from a recipe by The Pioneer Woman, the finished product fits perfectly into one of these:


In my defense, this is the last of the cookie buckets I have around the house. Promise. Back in the beginning and the testing phases of Oh Katie! Cookies, I was using this particular cookie dough. I tried many and Nestle was the absolute best, I tell ya! Thankfully these big buckets were sold at Costco. So we had many buckets all over the house left over from those days.

In fact, this picture is from the baby's birth, at home. It was so awesome! My husband used those buckets to pour warm water over my back. Thanks dear.


Today our oldest son is having a Thanksgiving Feast at school and I signed up to make the mashed taters. Hence, peeling and cooking potatoes at 7:00AM. No worries. I love creating food that makes others happy. I used the very last cookie bucket we had left in the house and it fit perfectly.

If you don't have your potato dish set for Thursday, I highly recommend PW's recipe. It's amazing!

Monday, November 22, 2010

All that is right and wrong with the world: Coffee Cookie Dough Fudge Cheesecake


I've recently gotten more into Twitter. And in doing so I have come across some amazing recipes and some fabulous people willing to share them and walk you through how they do it.

A recent discovery is Julie of Willow Bird Baking. Julie is a bright and cheerful young lady who is passionate about all things baking. The difference between Julie and I is Julie actually invents her recipes - and they are amazing! Whereas, I am just a newbie still learning about all this baking stuff anyway. I find a recipe and can create it. Granted, with my Oh Katie! Cookies, that's been an experience of testing and trying new things out. So I guess I should give myself a little bit of credit. But I'm nooooo Julie! And that's OK.

Last week I watched a video she posted. It was for a contest, I think. It was fun to watch. Extremely informative and walked the viewer right through the steps of making amazing cheesecakes while making it look fairly easy. Correction: "Flippin Awesome Cheesecakes."

Having never made a cheesecake before, I felt empowered with this information. Sunday was a beautiful, chilly, rainy day with two out of the three kids with Oma and Opa. The perfect baking day - while drinking many pots of coffee because that's just the kind of day it was.

Because I had the ingredients for the Coffee Cookie Dough Fudge Cheesecake, I thought I got this! Then I started looking more closely at all the steps and I started feeling more and more lazy. Maybe I could just sit and watch football in front of the fire with the hubby while the baby napped instead? Fine! I ranted. I'll make it! to no one in particular.

This is an all day process. At least it was for me. Well, "all day" meaning I started around 2 and we had a slice after dinner around 7. ALL DAY, I tell ya!

Cookie Dough Fudge Cheesecake

Recipe by: Willow Bird Baking, adapted from Annies’ Eats’ Cappucino Fudge Cheesecake with eggless cookie dough by Family Fun

Yields: one 9-inch cheesecake
Crust Ingredients:
32 chocolate sandwich cookies, finely processed into crumbs
5 1/3 tablespoons unsalted butter, melted and cooled
Small pinch of salt

Ganache Ingredients:
1½ cups heavy cream
20 oz. bittersweet or semisweet chocolate, finely chopped (I combined both)

Filling Ingredients:
3 (8 oz.) packages cream cheese, at room temperature
1 cup sugar
1½ tablespoons all-purpose flour
1 tablespoons instant coffee granules
2 teaspoons vanilla extract
1½ teaspoons mild-flavored (light) molasses
3 large eggs

Topping Ingredients:
1½ cups sour cream
1/3 cup sugar
2 teaspoons vanilla extract

Cookie Dough Layer Ingredients:
1/2 cup butter, softened
3/4 cup light brown sugar, packed
1 cup all-purpose flour
1/2 teaspoon salt
1 tablespoon vanilla extract
1 cup semisweet chocolate chips
4 to 6 tablespoons water (I used 4)

Directions:
To make the crust, butter a 9-inch springform pan. Combine the chocolate cookie crumbs, melted butter and salt in a small bowl. Toss with a fork to moisten all of the crumbs. Press into a thin layer covering the bottom and sides of the springform pan (at least 3 inches up the sides). I did this using a smooth glass to press crumbs into place.

Bring the cream to a simmer in a medium saucepan. Place the chocolate in a medium bowl. Once the cream reaches a simmer, pour the cream over the chocolate and let stand 1-2 minutes. Whisk in small circles until a smooth ganache has formed. Pour 1.5-2 cups of the ganache over the bottom of the crust. Freeze until the ganache layer is firm, about 30 minutes. Reserve the remaining ganache; cover and let stand at room temperature for later decorating.

Preheat the oven to 350˚ F and position a rack in the middle of the oven. In the bowl of an electric mixer fitted with the paddle attachment, beat the cream cheese and sugar on medium-high speed until well blended. Beat in the flour. In a small bowl, combine the coffee granules, vanilla and molasses, stirring until the coffee dissolves. Add to the cream cheese mixture and beat until well incorporated, scraping down the sides of the bowl as needed. Beat in the eggs one at a time, scraping down the bowl between each addition.

Pour the filling over the cold ganache in the crust. Enclose the bottom of the springform pan in tightly wrapped foil and place it in a baking dish. Fill the baking dish with hot water about halfway up the cheesecake pan, careful not to let the moisture touch the cheesecake. Bake until the top is lightly browned, puffed and cracked at the edges, and the center moves only very slightly when the pan is lightly shaken, about 1 hour. Transfer to a wire cooling rack. Cool 15 minutes while preparing the topping (maintaining the oven temperature.)

To make the topping, whisk together the sour cream, sugar and vanilla in a small bowl. Pour the topping over the hot cheesecake, spreading to cover the filling completely. Bake until the topping is set, about 10-15 minutes. Return to the cooling rack and let cool at room temperature for at least 30 minutes. Transfer to the refrigerator and let cool at least 3 hours, until completely chilled and set.

To make cookie dough layer, cream together the butter and sugar in a large bowl. Stir in the flour, salt, vanilla and chips. Add the water, one tablespoon at a time, until you have reached a cookie dough consistency. Line a 9-inch cake pan with parchment paper. Spoon the cookie dough into the pan and flatten to an even layer. Freeze the cookie dough layer until ready to use (at least 30 minutes).

To finish, wrap a warm towel around the outside of the springform pan to help loosen the crust from the sides. Carefully remove the springform. Transfer the cake to a serving platter. Turn cookie dough out of cake pan and place layer on top of cheesecake, pressing it gently into place. Place the reserved ganache in a pastry bag fitted with a decorative tip and use to garnish the top of the cake as desired. Chill until the ganache is completely firm, at least 6 hours.


And so it began. Beginning with the crust. My springform pan is slightly larger than what the recipe called for and I only had enough Oreos chocolate sandwich cookies for the smaller recipe.

I knew I would come up short in the crust area but I wasn't gonna let that stop me. Also, more than half of the Oreos chocolate sandwich cookies are the holiday version with the neon red (has to be poisonous) creamy center. So my crust has a slight red tinge to it. Who cares.


In Julie's video, she has the most perfect glass for compacting the cookie crumbs into the pan. I gotta find me one of those. I did the best I could with the flattest-bottomed glass I could find:

I abandoned this pretty quickly and just used my hands. You know, your (clean) hands often make the best tools in baking.


As I suspected I came up a little short on the crust department, but I really couldn't see how that would effect the final product. It didn't.


Next came a very interesting aspect of the cheesecake making aspect. One that is not found in most recipes. Typically at this point, I would put the crust into the oven and bake it for 10 or 12 minutes to set the crust. In Julie's recipe, however, and it appears to be this way in most of her cheesecake recipes, she creates a ganache and pours it on top of the crust instead of baking it.


The ganache was so simple and it was beautiful.


Soooo pretty! I will now be making a ganache and applying to everything. I think.


After pouring it over the crust and smoothing it a bit, the pan goes into the freezer to chill out for about 30 minutes. In the mean time, start making the filling. Which I have no pictures of. Pretty straight forward.

The most, the MOST important detail about making a cheesecake: your cream cheese and eggs must be room temperature. Must! There is no getting around this. If they are not, your filling will be lumpy and just plain pathetic!

Another important note when mixing your filling: scrape down the mixing bowl often. What do I mean by scrape down? Turn off the mixer, let down the bowl, and with a flat silicone spatula rub all the goo off the sides and bottom of the bowl and wipe it back on the mixing blade.

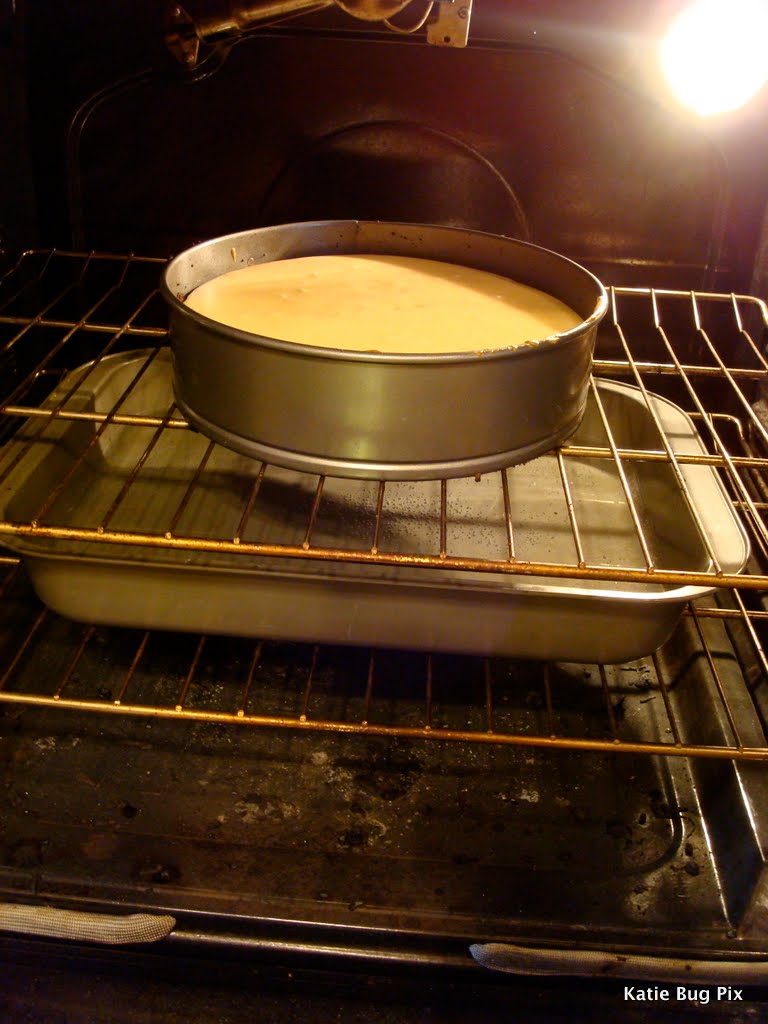
Glad we are all clear on that. Next important note on cheesecake baking (OK I didn't realize there were so many) water bath. Cheesecakes need water baths. They crave the extra moisture while baking. They just do. I didn't have any aluminum foil so I filled a large roasting pan halfway and put it just under the cheesecake in the oven. Perfect!


I felt so nervous about how long to bake it for and how to tell if it's really done or not. The directions are pretty clear: "lightly browned, puffed and cracked at the edges, and the center moves only very slightly when the pan is lightly shaken, about one hour." I still chew off several fingernails debating whether or not to take it out.


 Because I like to jump ahead, I made the first topping. There are two. So I mixed up the sour cream/sugar topping and was ready for it when it came out the first time. I applied it and smoothed it a bit. Then it went back in the oven.


This is my little scout making sure I have it all in there correctly. Yep, I do. I hope.
After this is done, it hangs out on a cooling rack for about 30 minutes. Then goes into the fridge for 3 hours. Told you it was an all day ordeal.


While that's happening, you then make the next topping: eggless cookie dough. It was so yummy and interesting! I would love to see if this batter actually bakes cookies or what they would be like. It goes into a pan then freezes.

Since I have a larger than normal springform pan, I knew a regular 9" pie pan would not work for the cookie dough topping. So here's what I did:


Tee hee. Hey, it works!


When dinner was over - and with my husband's help - I assembled everything and did some decorating with the left over ganache. Such a new and fun word!

 Here's the newborn cheesecake wrapped in her warm blankie....


So this is what the crust should do. And it did. On just this one part.


This is basically what it did on the rest of it. Again, I just can't possibly see how that would interfere with anything.


 At this point my husband kept glancing at me wondering why I was torturing him so, knowing I was not quite done.


There are no words from here on out.... Enjoy!

Saturday, November 20, 2010

Sugar-Rimmed Margarita Cookies. Say it with me: Hell Ya!


I have no recollection of how I came across a particular website which randomly brought me to this amazing sounding recipe of Sugar-Rimmed Margarita Cookies, but I did, and I don't regret anything about it.

There was some luring of a contest, oh yes, this one. And then some cookie search thingamajig, and, well, I just don't know how it happened. What I do know is when this recipe entered my eyes and then my brain, all was right in the world.

When I scanned the ingredients list wondering what exactly would make it a "margarita" cookie, there was only one spice that I did not have. One that I had never worked with or heard of before: rubbed sage. What is rubbed sage? According to my in-depth research, it's sage.... that has been rubbed in between fingers... so to speak. I feel complete with that answer.

I even had the lime! Which is really unheard of, but for some reason I purchased a lime recently.

Without further adieu, here are the ingredients and instructions:

Makes 5 dozen or 20 (3 cookie) servings.
Prep Time: 15 minutes
Refrigerate Time: 1 hour
Cook Time: 12 to 15 minutes per batch

INGREDIENTS
2 cups flour
1/4 teaspoon salt
3/4 cup (1 1/2 sticks) butter, softened
1 cup granulated sugar
1 egg
1 tablespoon finely grated lime peel
1 teaspoon McCormick® Pure Orange Extract
1 teaspoon McCormick® Sage, Rubbed
1/4 cup sanding sugar
1/4 teaspoon kosher salt
Tequila Glaze (recipe follows)

DIRECTIONS
1. Mix flour and 1/4 teaspoon salt in medium bowl. Beat butter and granulated sugar in large bowl with electric mixer on medium speed until light and fluffy. Add egg, lime peel, extract and sage; beat until well blended. Gradually beat in flour mixture until well mixed. Divide dough in half. Form each half into a log about 1 1/2 inches in diameter and 9 inches long. Wrap in wax paper.

2. Refrigerate 1 hour or until firm.

3. Preheat oven 350°F. Mix sanding sugar and kosher salt. Roll each cold dough log in mixture to coat evenly. Cut dough into 1/4-inch thick slices. Place on ungreased baking sheets.

4. Bake 12 to 15 minutes or until lightly browned around edges. Cool on baking sheets 1 minute. Remove to wire racks; cool completely. Drizzle Glaze over cooled cookies. Let stand until glaze is set.
Tips
Tequila Glaze: 1 cup confectioners’ sugar, and 1 tablespoon each water and tequila in small bowl until smooth. (Or omit tequila and use 2 tablespoons water.)

Test Kitchen Tip: Sanding sugar, also know as decorator’s sugar, is a large crystal sugar that will not dissolve when baked. It can be found in the baking aisle of some groceries, housewares and craft stores, and online specialty stores.

I did everything as listed.  Oh! The one other thing I did not have but easily jumped out at me at the grocery store was sanding sugar. OK, so I didn't exactly get "sanding sugar" but I did get the red colored decorative sugar and someone please tell me how that is any different? (cue crickets.) Exactly.

I mixed the dough which is very much a shortbread dough. Split it in two and rolled it up in wax paper. Into the fridge it went while I picked up my son from school then drove through the drive-thru liquor store to get the smallest bottle of tequila I could find to make the glaze. You should see the games I play when I go there. I am terrified they think I'm a lush.

In recent weeks I had a cookie order for Amaretto flavor and I was out of amaretto. I had to go through the drive-thru liquor store at 8:00AM! I was so embarrassed and nervous. Quite ridiculous really. "I bake with it!" I think I yelled, in hopes they would never *ever* guess that I ever drank alcohol of any sort. (Is this my second glass of wine or third?)

After we returned home I pre-heated the oven and got the sugar ready. Found it interesting that there is a 1/4 tsp of Kosher salt mixed with the sugar. I don't question these things. Just go with it after making a mental note. This was my first experience of rolling up a dough, chilling it, then slicing and baking. It was so stinkin easy! And made such pretty slices, especially with the brilliant red sugar (and salt!) on the "rim."

Must add this major detail: the dough was so good that it was dangerous. It was the kind of dough where you wanted to leave the last scoop in the mixing bowl just so you could eat it.

No worries. When you are slicing the chilled tube of cookie dough, you very well can't use the ends, right? (I have no idea why, but they just weren't up to par so me, my husband, and one son all ate the ends.) It tastes amazing!

I just found this pretty, after slicing.
Not perfect circle. I could have tried harder.
They seemed to wake a while longer to bake than was indicated. No biggie. It takes what it takes.
I liked the little speckles that were a part of the cookies due to the grated lime peel and the rubbed sage. And the bright red looked excellent, I think.

So the recipe gives you the option of making the tequila glaze with or without the tequila. USE TEQUILA! It's amazing! When you first make the glaze, the smell is absolutely overwhelming and you wonder if you'll get a DUI driving to get the mail. But then you (naturally) lick the whisk you use to make the glaze and it is the most subtle amazing flavor. Trying the first cookie right after the glaze is applied in one experience, and waiting a few hours while the tequila evaporates some, is entirely different experience.

I literally told my husband he could not try a cookie since he was on his way into work - the smell was so strong. Wonder how often I can use that one before he catches on.


I'm not yet really good at the fancy shmancy decorating yet. One day I might be, I really don't care. The glaze in *on* the cookie. That's what matters, right?


And here they are all ready to go to my Uncle Keith's birthday party tomorrow. Where I am sure someone will make a comment on how I am "always" baking with alcohol. Where I will then go find this box of cookies and lick off all the frosting out of spite.


Thursday, November 11, 2010

November's Flavor of the Month - Pumpkin Spice - Hold Everything!

Here's a confession about the flavors I choose - they are mostly based on instinct.

For my standard menu I must limit myself or I would never stop adding to the list. But it's just me creating these cookies and it's not feasible - at this time - for me to have a menu of 53 different flavors. Not yet.

To keep myself (and my customers) interested and excited I have the Flavor of the Month feature. It's really fun to think of how the month would taste in regards to the season, any holidays, or just the "feel" of the month. The coffee flavor came about because my eyes ran across a bottle of Bailey's Irish Creme Coffee Liqueur in the grocery store and I do believe I peed a little.

This month was pretty easy. I was at the Restaurant Depot in Phoenix a couple months ago a saw a bottle of Torani Pumpkin Spice syrup. Well, no question in my mind: there was November's flavor. When November arrived and I started made a batch of the filling, the syrup enough wasn't quite cutting it. I was having to add too much syrup in order to get any real flavor so I knew I needed pumpkin extract. I searched Amazon - which I'm not proud of, by the way - and found it from a company called Faerie's Finest. The bottle cost around $5 but the shipping was over $7 - that's why I dislike Amazon so much.

When the bottle arrived I remade the filling using the pumpkin extract as well as the syrup, adding only a little at a time. Words don't describe it. The smell alone is satiating enough.

So I am proud to present this month's Oh Katie! Cookie Flavor of the Month: Pumpkin Spice.
Now, looking at Faerie's Finest stock, I do believe I have died and gone to baker's heaven. And Nicole, I just might be able to pull off the peanut butter and jelly, marshmallow, banana, chocolate you asked about a few months ago. (Crazy Brits!) Cheers!